Adding an ICSP header to the ATmega256RFR2
I am currently working on building a simple wireless sensor using the ATmega256RFR2 Xplained Pro Evaluation Kit . This kit includes a base board and a bunch of other peripherals to mess around with.
When I started reading up on the kit I noticed it required windows to install some 600mb + more IDE (gasp), to hack on a small micro controller. This really didn’t gel with me, especially considering said IDE:
- ONLY works on windows
- Visual Studio is bloated piece of shit
- Has all this other “professional” features which i don’t give a shit about
- Is driving a 30mb included gcc tool chain..
So how do we ignore this and get started without this thing?
Well firstly we need an ICSP port, this will enable us to write a simple boot loader. This will enable use to load a firmware onto the board and get started doing some basic hacking.
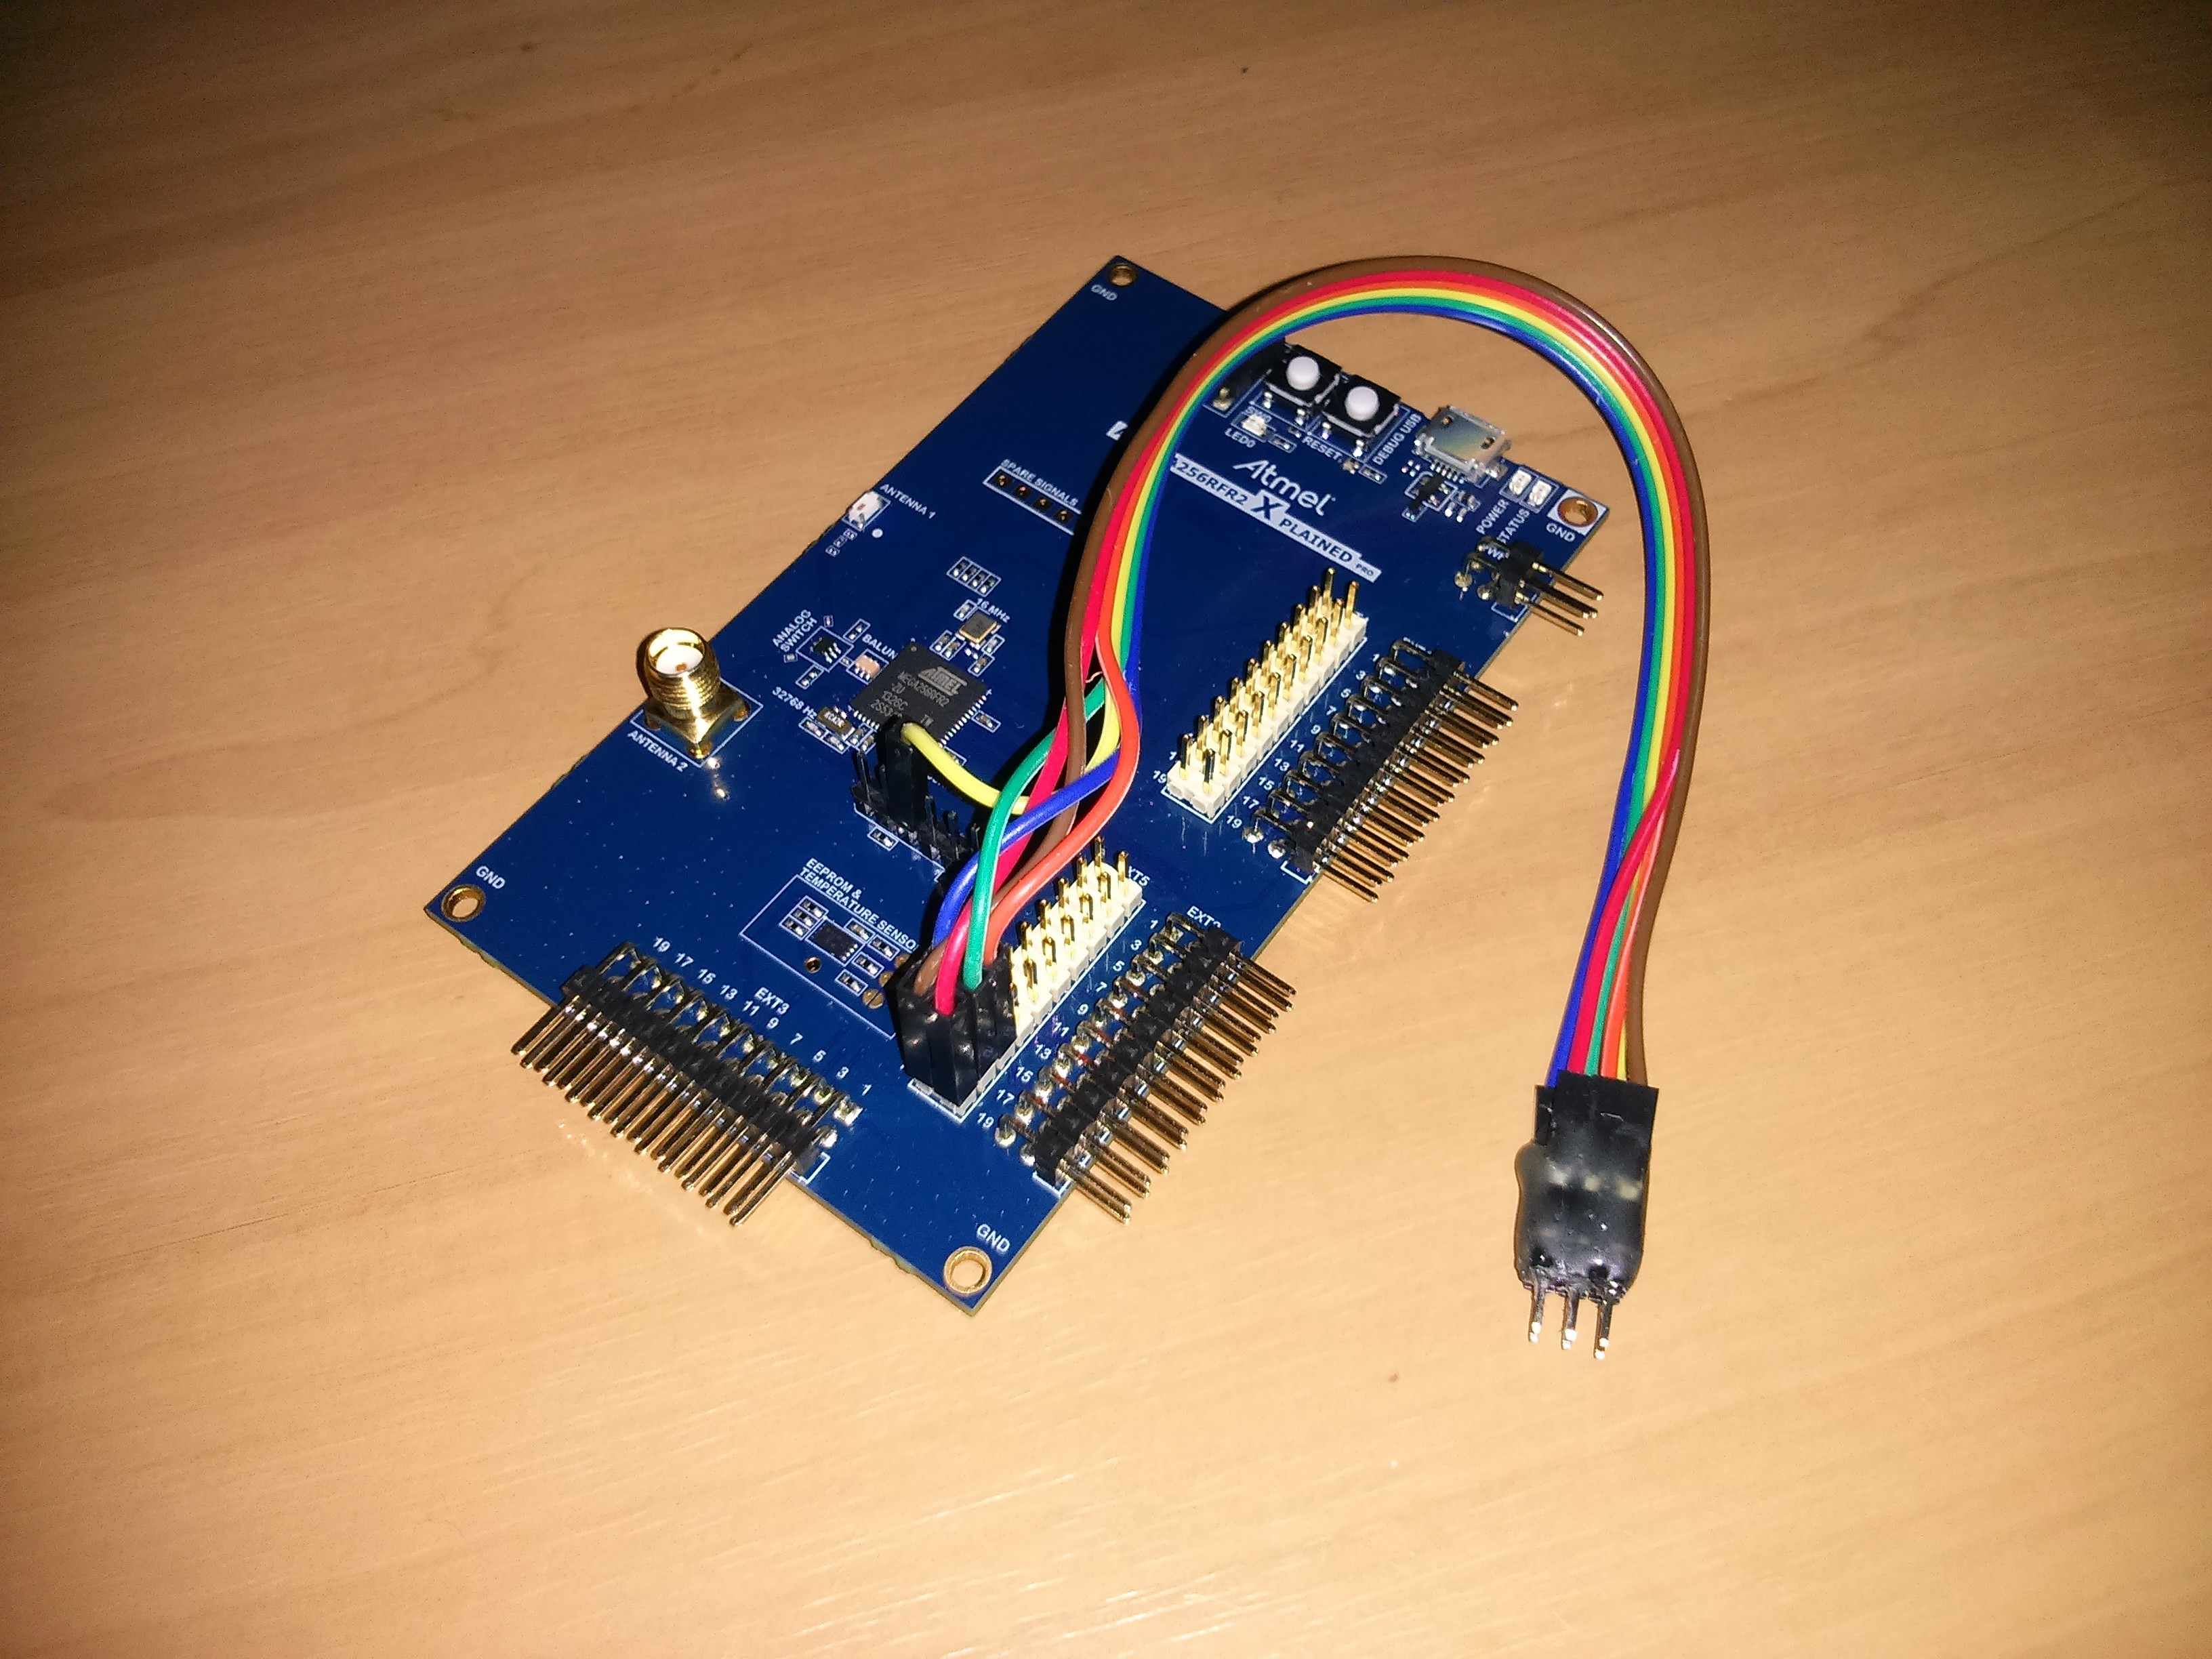
The cable I used had the following coloured wires, to bind these into a six pin connector Andy Gelme used a hot glue gun. It is amazing how handy these things are..
The configuration of the header wire colours are:
BLUE	RED
GREEN	ORANGE
YELLOW	BROWN
The standard Arduino ICSP 6 pin header is as layer out is:
MISO	VCC
SCK     MOSI
RESET	GND
So to wire this up to the board I first had to solder 5 pins into the spare signals header, this enabled me to access the RSTN pin, which in the ICSP header is called RESET.
The wires were connected as follows:
- MISO (BLUE) PIN17 on the ext5 header
- VCC (RED) PIN20 on the ext5 header
- SCK (GREEN) PIN18 on the ext5 header
- MOSI (ORANGE) PIN16 on the ext5 header
- RESET (YELLOW) RSTN on the spare signals header
- GND (BROWN) to PIN19 on the ext5 header
The final product looks like:
So to write the firmware onto the board a USBasp ICSP Programmer for AVR / Arduino was used. The firmware I am currently running was built by some hackers at CCHS Melbourne . At the end of the day a fork of Contiki was up and running on the board! I am hoping this gets open sourced soon.
The toolset I am using at the moment is Crosspack AVR which works great on OSX. I also have a build environment on ubuntu in a virtual machine which I am using just to test things.
In addition to this fork of Contiki we also tested running some simple Arduino applications on my board using avrdude to upload the hex files.
The aim of this project is to get an MQTT client onto this board and transmit values from the various sensors to a gateway device running linux over 802.15.4 mesh using 6LoWPAN .
Thanks to the people at CCHS Melbourne for their help.
I am planning to follow up with some posts on each of the layers as I learn more and work my way up the stack.